Unity Cookbook. Tilemaps
Tilemaps and tile-based backgrounds
What is a tilemap?
- Tilemaps are images that are split into constant-size tiles
- They’re used often for creating loads of background art in 2D games
- A good introduction to Unity tilemaps:
- See this free asset pack for example!
Tilemap asset
![]()
- Manual: Tilemap workflow
- To create a new tilemap, add an image into your project that contains a tilemap
- Change its settings in inspector (see image)
- Set Sprite mode to Multiple
- Set Pixels per unit to grid size (e.g., 32)
- Open Sprite Editor and click Slice
- Set Type to Grid by cell size, click Slice
- Close the Sprite editor and save.
- Now the sprite asset should have the individual tiles visible like this:
Tilemap & Grid GameObjects
- Create a new Tilemap GameObject: 2D Object > Tilemap > Rectangular
- We will draw the levels to the TileMap GameObject
- A Grid GameObject gets creates as the parent object of the tilemap
- It defines the level-wide grid
- We usually only need one Grid GameObject per scene
- For multiple layers, you can create multiple tilemaps under the same grid
- It’s a good idea to have at least two layers:
- “Terrain tiles” for traversable background
- “Wall tiles” for collidable walls
- Tilemap GameObject has two components
- Tilemap Component, Manual: Tilemap
- Tilemap Renderer Component, Manual: Tilemap renderer
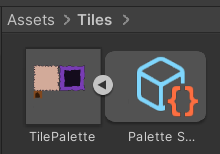
Creating a Tile Palette
- First off, create a new folder for the tile assets (e.g. Assets/Tiles) we’ll create shortly
- We need a new window, Tile Palette, to pick the tiles we draw on the tilemap
- Window > 2D > Tile Palette
- By default, it does not contain any tiles (a.k.a., a palette) to choose from.
- Click Create new palette
- Choose a name that describes the tile palette (Like GroundTilePalette), and click Create. Save the palette asset to the tile assets folder we created
-
The tile palette is a prefab asset that we don’t need to touch
-
Drawing with the tile palette
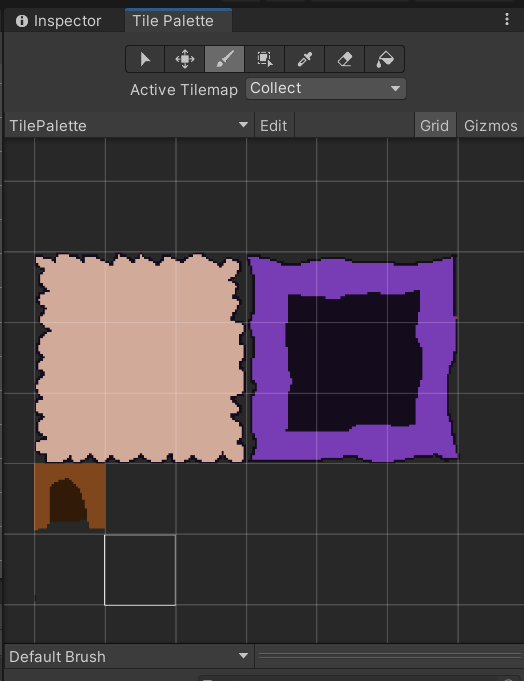
- Now that we have a palette, we can drag the tilemap sprite asset from the Project window to the Tile Palette window.
- This creates tile assets for all tiles: Manual: Tile Assets
- Choose the folder we created earlier Assets/Tiles to save the assets into
- Then, paint away to create your tile-based level! The brush tool should be active by default.
- Note: We can also drag regular single sprites into the tile palette!
Tile palette pro tips
- Use the Pick or marquee select tool (Eyedropper) to quickly copy-paste areas in the tilemap.
- Hold CTRL when Eraser is selected to make the eraser bigger.
- There are also hidden flip & rotate tools!
- Go to Preferences > 2D > Tile Palette
- Select a tool in the list and press the + Button.
- FlipXTool, FlipYTool, RotateClockwiseTool, RotateCounterClockwiseTool
- The tools are a bit counterintuitive, but they’re easier to use with hotkeys
- On Finnish keyboard:
- Rotate: `, Å
- Flip: SHIFT +`, SHIFT + Å,)
- On Finnish keyboard:
Collision
![]()
- To add collision to your tilemap layer, just add the Tilemap Collider 2D component
- Shape of the collider is decided automatically by Unity for every tile
- Enter play mode once to see how the collider is shaped
- You can change tile collider for every tile:
- Open the Sprite settings and go to Sprite editor > Custom Physics Shape
- Click on a tile that had bad collision shape and click Generate
- Note: If you want to only have square grid collisions, you can also just use a separate invisible layer for collisions (disable its Tilemap Renderer component)
2D Tilemap Extras
- Packages: 2D Tilemap Extras
- 2D Tilemap Extras Package contains many goodies
- Autotiling
- Animated tiles
- GameObject tiles…
- Comes in 2D projects by default nowadays
<!–
- It’s in the Unity Package Manager as a Preview package
- Cogwheel > Advanced Project Settings > Enable Preview Packages
- Packages dropdown: Unity Registry –>
2D extras: Autotiling
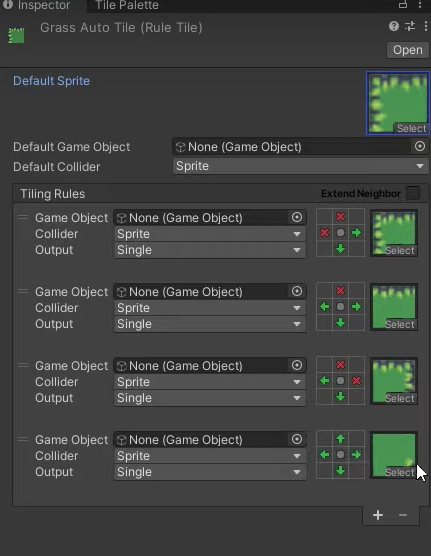
- Autotiling is a technique for creating 2d levels faster with Rule tiles
- E.g., instead of inserting every corner tile by hand, autotiling inserts corner tiles where they should appear
- How To Use Auto Tiling in Unity 2020 (might be outdated in some aspects)
- Open Project Window and right click, then choose Create > 2D > Tiles > Rule Tile
- Drag a sprite to Inspector
- Add Tiling Rules (see next slide)
- Then, Drag the Rule Tile to an empty slot in the tile palette. You’re done!
2D extras: Animated tile
- Use the Animated Tile to create tiles with animations in them.
- Great for waterfalls, animated torches etc. in the background
- Create > 2D > Tiles > Animated Tile
- Drag sprites to the tile in the Inspector
- Set animation speed (if you want the speed to always be the same, set the minimum and maximum speed to a same value)
- Drag the newly created animated tile from Project window to Tile Palette
- Now you can draw with the animated tile!
2D extras: GameObject tile
- GameObjects can be “drawn” (created) as tiles in the tilemap with the GameObject brush
- It’s a different brush than the default brush we’ve been using and has to be set up first
- Remember to go back to default brush when you want to draw background tiles again!
- You’ll need a Prefab of the GameObject you want to spawn in the tilemap
GameObject tile setup

- In Tile palette, choose the brush tool
- Change Default brush to GameObject brush
- Drag the GameObject Prefab to Element 0
- Click Edit to enter the edit mode
- Click on the tile you added the sprite to
- Click Edit to exit Edit mode.
- Now, when you click on the chosen tile, it should display the GameObject in Element 0.
- Use the GameObject brush to add new GameObjects - they’ll show up in Hierarchy right away.
Exercise 1. A tiled level
Import a tilemap from an existing sprite sheet. Create a tiny level out of your tile assets!
GameObject on a grid
- Note: If snapping to the grid is your concern, you’re better off using the GameObject tile
- Without the GameObject tile, you can do it like this:
- To snap a player character to a grid, you have two options:
a) Move the grid to position (0.5, 0.5)
b) Make the player’s sprite renderer a child GameObject, and move it to coordinates (0.5,-0.5,0)
- Also, add the same offset to player’s RigidBody
- Then, click on the Snap to grid button (left side of Play button)
Fixing ugly seams in tilemap
- Many things can cause this.
- In Game Mode, create a new resolution and set it to a Fixed resolution that is a multiple of your tile size
- For example, for a tile size of 32, a 480x320 is a good choice.
- Edit > Project Settings > Quality > Anti-aliasing: Disabled
- See also 2D animation: Pixel art in unity
- You might even have to create a custom material for all pixelart sprites that has Pixel snap enabled