Unity Cookbook. Physics
Physics
Unity physics engines
- Manual: Physics
- A physics engine is used to calculate accelerations, collisions, gravity and other forces
- In 3D, Unity uses NVIDIA’s PhysX for its physics
- In 2D, Unity uses Box2D
- When you add a physics component to a GameObject, it is then part of the physics system
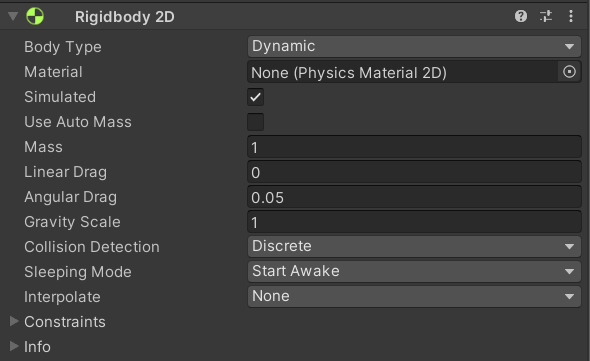
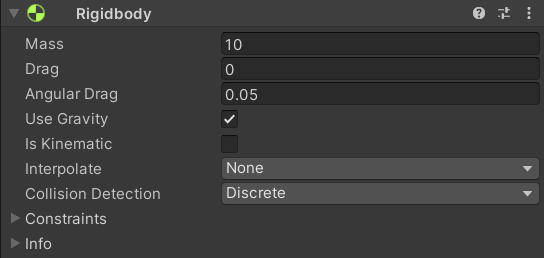
- Rigidbody, Rigidbody2D
Built-in physics engines
Rigidbody
- 3D
- 2D
- Literally: a body (object) that does not deform, i.e., is rigid
- Takes over the movement of the GameObject it is attached to
- Note: Do not move it from a script by changing the Transform properties such as position and rotation
- Instead, you should apply forces
The Rigidbody components


- Every rigidbody has a mass, which affects how much forces influence them
- Note: If you have problems having two non-moving Rigidbody2Ds collide, set Sleeping Mode to Never Sleep
Types of rigidbodies
- Dynamic
- is part of the physics engine and behaves like a “regular” physics-based object
- can be controlled indirectly (with forces)
- Kinematic
- is not affected by the physics system
- only queries the physics engine for collisions
- can be controlled directly:
- in 2D, use
Rigidbody2D.MovePosition,Rigidbody2D.MoveRotation - in 3D, manipulate
transform.position
- in 2D, use
- Static (only 2D)
- an immovable object, can only collide with non-static rigidbodies
Interpolation
- Script Reference: Rigidbody Interpolation
- Interpolation allows you to smooth out the effect of running physics at a fixed frame rate.
Constraints
- Script Reference: Rigidbody Constraints
- “which degrees of freedom are allowed for the simulation of this Rigidbody”
- You can freeze position or rotation of a given axis
Moving dynamic Rigidbodies
-
You should interact with the physics system in
FixedUpdate, notUpdate - Script Reference: Rigidbody.AddForce
if (Input.GetButton("Jump")) { //Apply a force to this Rigidbody in direction of this GameObjects up axis m_Rigidbody.AddForce(transform.up * m_Thrust); } - Script Reference: Rigidbody.AddTorque
float turn = Input.GetAxis("Horizontal");
rb.AddTorque(transform.up * torque * turn);
Force modes
- When applying a force, you can give the function a second argument: the mode with which the force is applied
- ScriptReference: ForceMode has a good example project showcasing all four modes
ForceMode.Forceis the default: the resulting acceleration is dampened by the mass of the rigidbodyForceMode.Accelerationgives acceleration directly, disregarding the mass of the body.ForceMode.Impulsegives the body a velocity (dampened by its mass), not an acceleration, resulting in snappier movementForceMode.VelocityChangeis like impulse, but disregards the mass of the body.
- Note: Rigidbody2D only supports
ForceMode.ForceandForceMode.Acceleration!
Extra: More functions
- Rigidbody.AddRelativeForce
- Adds a force to the rigidbody relative to its coordinate system.
- Rigidbody.AddRelativeTorque
- Adds a torque to the rigidbody relative to its coordinate system.
- Rigidbody.AddForceAtPosition
- Applies force at position. As a result this will apply a torque and a force on the object.
Changing the velocity directly
- You can also manipulate rigidbody velocity directly
- Do this only if you don’t get desired effects with AddForce or AddTorque
- Velocity
- Script reference: Rigidbody.velocity (Vector3)
- Script reference: Rigidbody2D.velocity (Vector2)
- Angular velocity
Gravity
- Note: by default, gravitational acceleration is $9.81m/s^2$
- You can change it from Unity settings
- Edit > Project Settings > Physics (2D) > Gravity
- for top-down 2d games, you want gravity to be zero
Extra: Raycasting
- See 2D basics