Unity Cookbook. 3D with Blender
Blender basics
- Before we start:
- In Edit > Preferences > Keymap, Change Spacebar action to Search.
- 3D objects consist of vertices (points), edges and faces.
- The default 3D object in Blender is a cube.
- Use left click to choose an object.
- We can manipulate the shape of the chosen object in the Edit mode, and move the objects themselves around in Object mode.
Navigation
- Hold Mouse wheel button to rotate view.
- Shift+hold Mouse wheel to pan the current view.
- Roll the mouse wheel to zoom in/out
- To move between cardinal axis views, press numpad 1/3/5/7.
- Press numpad 5 to change between perspective and orthographic views.
Edit mode
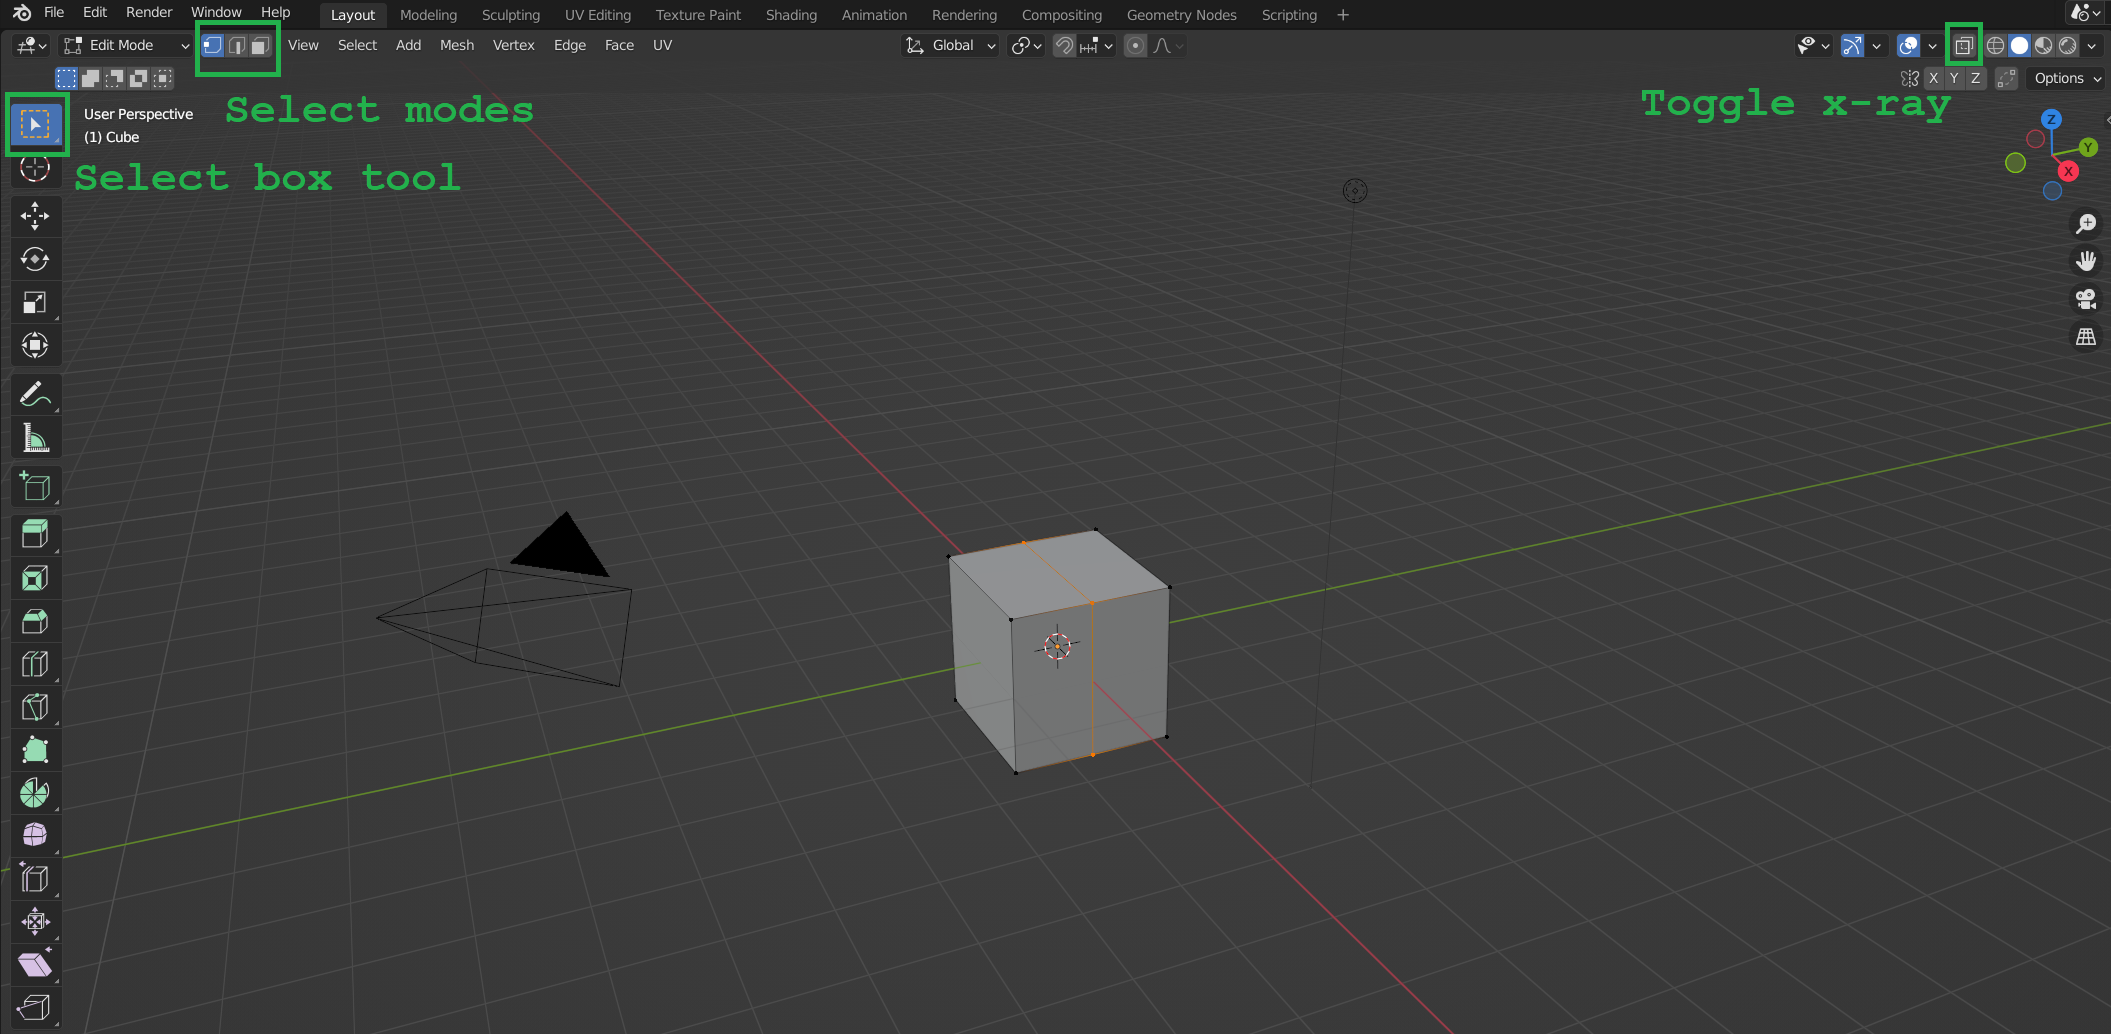
- Tab: jump between Edit/Object mode.
- In Edit mode, we have three select modes:
- Vertex select
- Edge select
- Face select
- Be sure you have the Select box tool selected!
- Use LMB to select.
- Hold CTRL to select more!
- Protip: Click the Toggle x-ray button to see vertices, edges and faces behind the surface.
Transform selection tools
- E: Extrude selection
- S: Scale selection
- R: Rotate selection
- After choosing any of the three tools above, you can press X, Y, or Z, to only transform along that axis.
- Press X,Y, or Z again to transform along object’s local axis.
- You can also press Shift+X etc. to transform along a plane (in this example, the Y-Z plane)
Cutting tools
- CTRL+R: use loop cut tool to add a new subdivision
- Click once to choose which face to loop cut, then:
- Roll mouse wheel to choose how many subdivisions you want
- Press Enter to confirm or ESC to cancel.
- K: to use knife tool to add a new subdivision
- Click LMB to start cutting
- Click again to start a new cut
- Press Enter to confirm or ESC to cancel.
Extras: Vertex colors from Blender to Unity
https://stackoverflow.com/questions/48312958/showing-a-model-with-vertex-painted-colours-in-unity