Unity Cookbook. 3D animation
3D animation
3D character animation
- A 3D character is created in a dedicated 3d program like Blender
- Skeletal animations are created for the character in the program as well, and then exported to a format Unity understands
- In Unity, a 3D character usually consists of three GameObjects:
- Character GameObject that contains the Animator component
- Mesh GameObject that is used to draw the character
- Skeleton GameObject that contains the rig
- Character GameObject that contains the Animator component
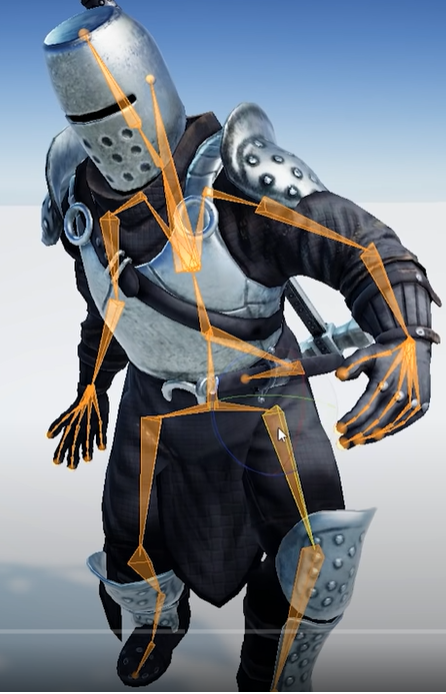
Importing animations from Blender to Unity
- Easiest way to import animations from Blender to Unity is to use Game Rig Tools
- Game Rig Tools (Blender addon)
- Video tutorial: Blender to Unity - Generic Character Setup: #1 Rigging & FBX Export
- Video tutorial: Blender to Unity - Generic Character Setup: #2 Unity Setup
Unity side setup
Importing the model
- Docs: Importing a model
- Docs: Model Import Settings window 1) Add imported .fbx file to your the assets folder of your Unity project 2) Edit .fbx import settings in the Inspector view:
- Rig tab
- Animation type: Generic or Humanoid
- Avatar Definition: Create from this model
- Click Apply
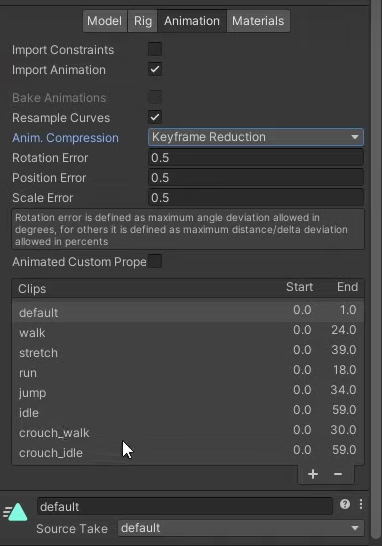
- Animation tab
- Animation clips show up here (Blender actions are called clips in Unity)
- For looping clips, check the Loop time box.
- Materials tab
- Click Extract Materials… to import Blender materials
- The imported material should show up under Remapped materials
Importing textures
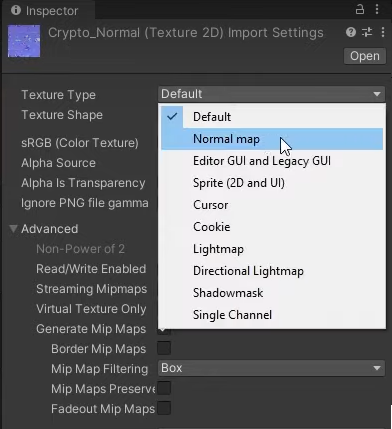
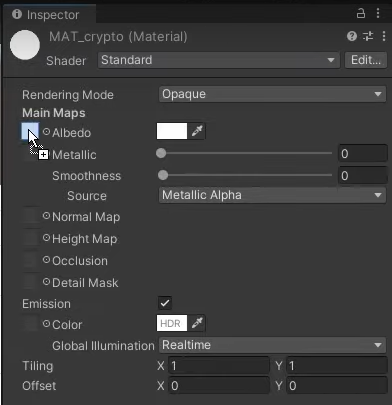
- Move your textures to the Unity assets folder
- Set special textures to their correct types:
- Normal map should have a corresponding Texture type (Fig. 1)
- Then, drag the textures to the imported material(s): Albedo to albedo slot, etc. (Fig. 2)
Setting up the character
-
Next, we’ll setup the character with some components and GameObjects.
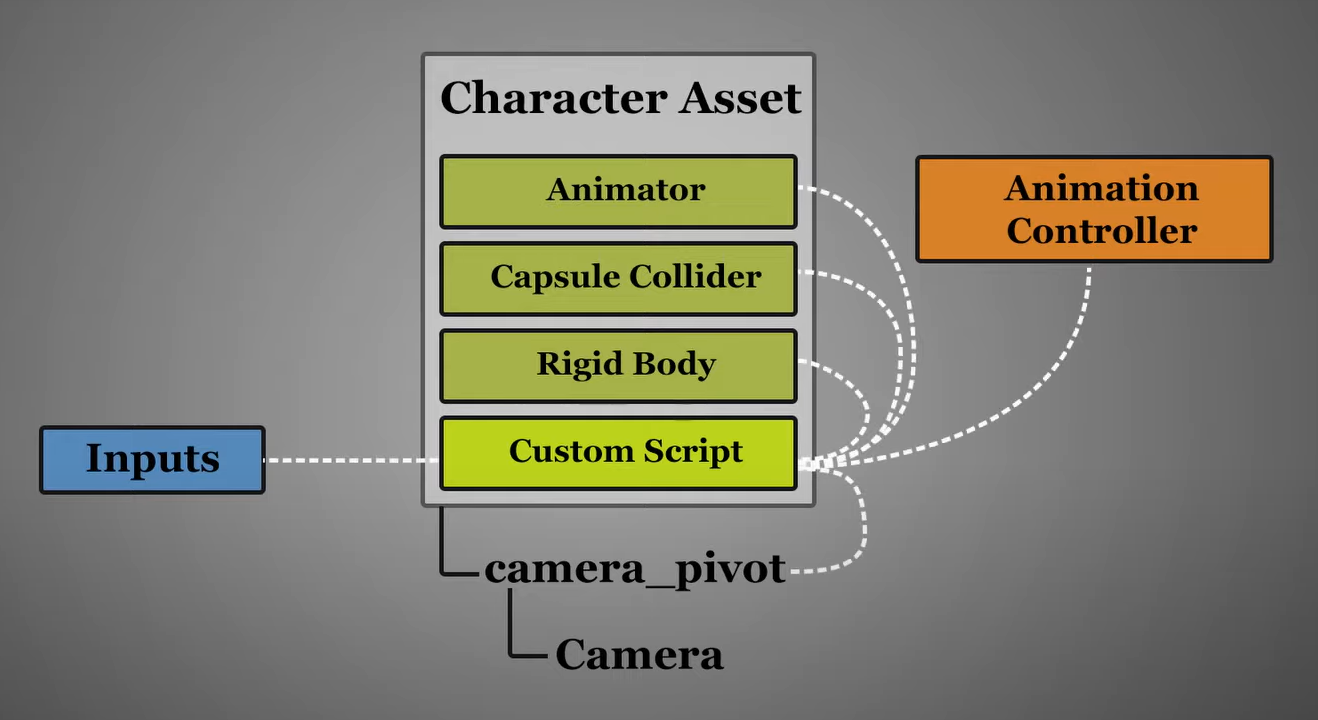
1) Add the imported character to your scene 2) Add components:
- Animator (if does not yet exist)
- Rigidbody
- Capsule collider 3) Add a new empty called Camera pivot under the character
- Add a Camera GameObject under the pivot 4) Add a movement script that controls the animations
Animator Controller
- Here’s how to control the animations with an Animator Controller (see 2d animation for more info)
- Create a new Animator Controller for the character
- Drag and drop the controller to the character’s Animator component
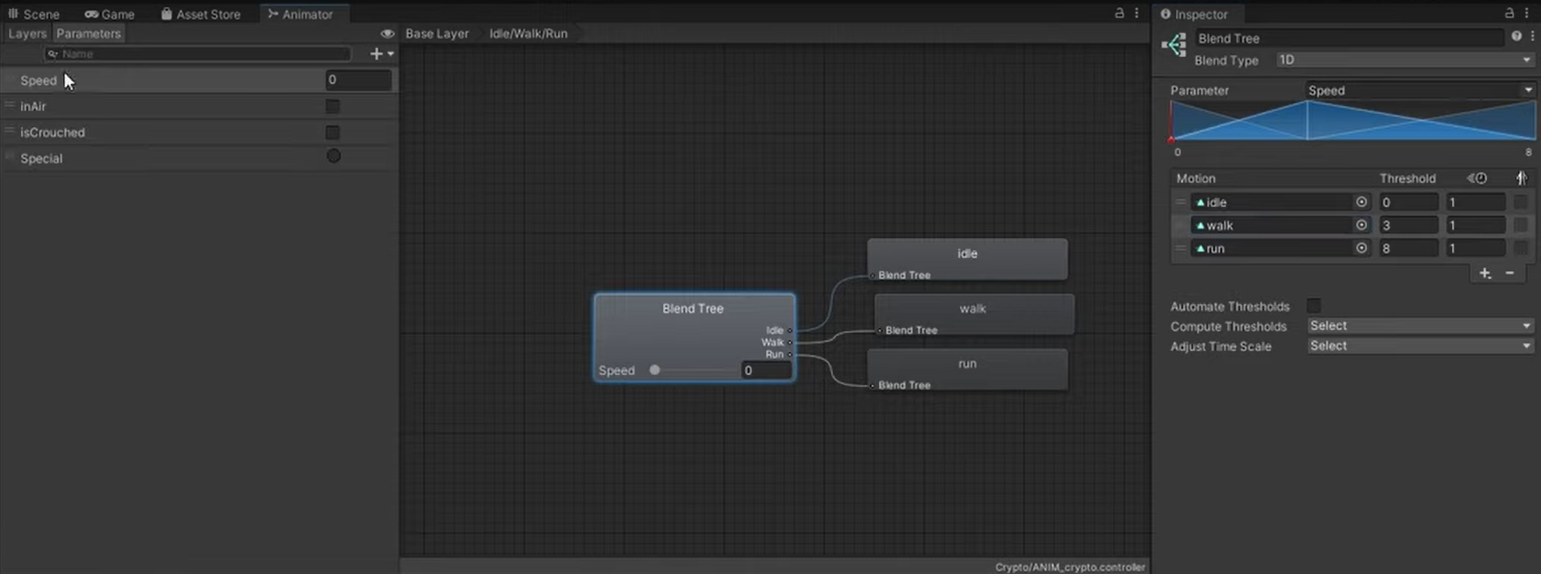
- Add parameters to control the animations with (
speed,isCrouching, etc…) -
Create states for the animations. Here’s a blend tree for walking/running:
Extra: Interactive animations with Avatar mask
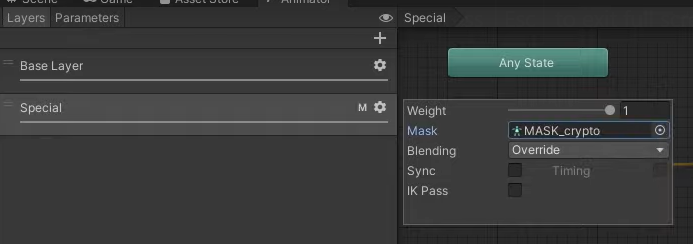
- If you want to play interactive animations (like yawning or talking) during other (walking, idle…) animations, add a new layer in the animator controller
- Create a state for the special animation, and add a transition condition from New state
- Create a new Avatar mask that has only the bones applied that are needed for the special animation
-
Apply the mask for the special layer
-
![]()
Reading
- Free ready-to-use characters by Adobe: Mixamo
- Docs: Inverse Kinematics